November 28, 2009

Thanksgiving has come and gone

My plate from bottom left: stuffed, roasted seitan with mushroom gravy, salad, potato kugel, roasted veggies and figs, herbed orange-cranberry relish

Thanksgiving has come and gone, and most people have moved on, but I'm still dragging my feet about my Thanksgiving post. Please indulge me while I do a little blurb about our feast so I can move on, too. We had the whole family at our home this year which was a unique treat for us since we've not lived in the same city with all our kids in a long time. The guests brought contributions to the meal so the work was spread around a little. I got so caught up in the celebrating that I forgot to photograph some parts of the feast, like the delicious potato kugel brought by our oldest son and daughter-in-law. This is an old family recipe that came to the U.S. with my Russian great-grandmother, and appears at nearly every family holiday event. It just wouldn't be a holiday without it. I forgot to photograph the Thai coconut corn soup based on a recipe in "Vegan Express" by Nava Atlas. I love this soup, and have served it to a LOT of people. (My adapted recipe appears at the end of this post.) And I didn't photograph the mushroom gravy.

The main dish for Thanksgiving at our house is always stuffed seitan. Here you see it (uncooked) in the baking dish with the stuffing. My husband's fingers are keeping the very elastic seitan from shrinking down into the pan while I do a photo shoot. The stuffing is brown rice, wild rice, home-made-bread cubes, mushrooms, celery, shredded carrots, onions, dried cranberries, herbs and spices, and maybe other things, too.

The seitan is first rolled out and then transferred to the dish, where it's filled, and the top folded over and sealed. It's always a stressful and comical process to roll out the stretchy seitan and get it into the dish before it shrinks up, but this year I made a brilliant discovery. I rolled the seitan onto a large sheet of parchment paper, and it seemed to stick in place. My husband and I then lifted the whole thing up and placed it, paper and all, into the dish, to be stuffed. (I also added chickpea flour to the seitan mix which may have made it more pliable.)

After the stuffed seitan was baked, we lifted it out of the baking dish and onto the serving platter using the paper. It was so much easier then trying to un-stick it from the pan! I raised the seitan up a little with a spatula and slid the paper out.

In the photo above you see the vegetables — Brussels sprouts, turnips, carrots and potatoes — before they went into the oven to roast. When they were nearly done, dried figs were mixed in. I forgot to photograph the veggies after they were roasted to perfection with olive oil and herbs.

For starters, we had various raw veggies, olives, pickles, crackers, hummus and Tings. (Yes, that's right, Tings.) We also had bowls of Thai coconut corn soup. This soup takes only minutes to make but tastes like it took hours.

Here's the herbed cranberry-orange relish I blogged about recently. This time I remembered to decorate it.

This is the fabulous salad brought by our middle son and his girlfriend. It was delicious.

We had two desserts. We had almond twilles filled with pumpkin mousse. (Our mini-guest was particularly taken by the mousse and wanted more, more, more...)

And we had a pumpkin chocolate spice cake from this recipe, minus the anise (I HATE anise. Ugh.) and with only 1/4 teaspoon of cayenne. (note: The ganache from the recipe didn't work for me — there was way too much liquid and it turned into chocolate milk. Luckily I had extra chocolate on hand and made my own version of ganache using only 1/4 cup of non-dairy milk, 1 tablespoon of coconut oil and 1 tablespoon of Earth Balance.)

Because I've made several alterations to the coconut corn soup recipe, and because the original appears in several places on the Web, I'm going to share my version, here. This is the perfect soup to make when you want something that doesn't take much time or effort but tastes great.

Thai coconut corn soup (adapted from a recipe by Nava Atlas)
  • 1 tablespoon light olive oil
  • 3 cloves garlic, minced
  • 4 to 5 scallions, white and green parts, thinly sliced
  • 1 medium red bell pepper, cut into short, narrow strips
  • One 15-ounce can light coconut milk
  • 2 cups low-sodium vegetable broth
  • 1½ cups rice milk
  • One 16-ounce bag frozen corn
  • 2 teaspoons good quality curry powder
  • 1/2 teaspoon Thai red curry paste, more or less to taste
  • 1/2 to 1 teaspoon salt, or to taste
  • juice from 1/2 small lime or lemon
  • ½ cup minced fresh cilantro or Italian parsley
  1. Heat the oil in a small soup pot. Add the garlic, the white parts of the scallions, and the bell pepper. Sauté over medium-low heat until softened and golden, about 2 to 3 minutes.
  2. Add the coconut milk, rice milk, broth, corn, curry powder, the green parts of the scallions. If using the curry paste, dissolve it in a small amount of hot soup before adding to the pot.
  3. Bring to a rapid simmer, then lower the heat. Cover and simmer gently for 5 minutes. Season with salt and citrus juice, and remove from the heat.
  4. Serve, with cilantro or parsley and fresh ground black pepper.
Yield: 6 servings of spicy soup.
You can substitute two cups of rice milk for the vegetable broth if desired. I've done it both ways and I like the broth version best, but both are good.

November 23, 2009

Cookies and stew


I've been collecting recipes like crazy — actually printing them out instead of just bookmarking them — but have been cooking very little. We've been eating out much more than usual, and that always seems to dampen my cooking urges. Unfortunately, we haven't been very happy with the restaurant food we've been sampling except for one place. We really enjoyed our brunch at Wayward Café, and tried to go there two other times without checking their hours, only to find it closed. You'd think all these unpleasant restaurant experiences would inspire me to cook more, but it's not happening. Maybe I'm saving my food-cooking energy for Thanksgiving, or maybe I'm just in a rut.

Last night there was nothing planned for dinner when our son and daughter-in-law extended a last minute invitation to come to their house.

Our d-i-l was making Buckwheat Stew With Tofu and Kale from Mark Bittman's "How to Cook Everything Vegetarian," which they had just borrowed from the library along with "Vegan Cookies Invade Your Cookie Jar," by Isa Chandra Moskowitz and Terry Hope Romaro. She didn't have the right kind of buckwheat so she made the stew with farrow, instead, and it was absolutely delicious — rich and satisfying. The white things that look like potato pieces are actually whole cloves of stewed garlic — soft, fragrant, and tasting like it was roasted in the oven. Kale is one of my favorite vegetables, and this recipe really showcased its winning qualities. I wish I had some right now.

For dessert we had Peanut butter oatmeal cookies from the above mentioned cookie-invasion cookbook. These were some of the best peanut butter cookies I've tasted, with excellent texture and crunch. I think I ate four. Tsk.

.......................................................................

Animal, Vegetable, Miserable
by Gary Steiner

Have you seen this Op-Ed piece in the Sunday NY Times? It's pretty unusual to see such a blatantly unapologetic essay on the moral wrongness of killing animals for human needs, in the mainstream press. Take a look.

.......................................................................

Have a HAPPY and HEALTHY THANKSGIVING!

November 19, 2009

Whole baked squash / Bean and corn fritters /microwave popcorn

My son thinks it's amazing and stupid (amazingly stupid?) that I've never made microwave popcorn; it seems perfectly reasonable to me since I've never owned a microwave. This has come up because lately I've been thinking about, and wanting popcorn, and our hot air popper was left at our house in Wisconsin when we came to Seattle. I assume the renters are using it, and we don't have a popper here, nor do we have an appropriate pot to use for popping corn on the stove. I don't think I can use a pot belonging to the people who own the house we're renting as it could get wrecked by popping corn in it. At least that's been my experience. After half-heartedly looking for a used air popper at Goodwill (though truthfully, we don't really want to accumulate more "stuff" since we have to move again in July), my son pointed out we have a microwave, and could make microwave popcorn. But that stuff is expensive and usually has flavorings and chemicals I don't want to eat. After doing a little Internet research, I've learned you can make your own microwave popcorn in a paper bag. I'm curious to try this to see if it works for me. Obviously it works for others but ya never know until you try it yourself. Has anyone tried this?

So I've learned a new trick this week. Actually it was the second new trick. The first was learned by my husband this past weekend — he learned to bake a squash whole. That's right, no grunting, groaning, teeth gnashing or cursing while trying to cut open a winter squash that seems to be made of steel. He just put the whole thing into the oven and took it out an hour later all soft and easy to open. It happened to be a spaghetti squash which we served with artichoke spaghetti sauce and steamed kale. (I think my husband would eat artichoke spaghetti sauce every day, whereas I prefer a little variety.) You can find more complete instructions here. I found this post after my husband had learned the trick elsewhere, and it's a good description of what to do.

Rambling on, I saw a recipe in Vegetarian Times for chickpea croquettes. I was particularly interested in making this recipe because it contained a whole cup of chickpea flour, and I'd just recently purchased a bag. Once in the kitchen, of course, I realized that yes, I had the chickpea flour, but almost none of the remaining ingredients. Since I changed the recipe so much, I think it will be OK to print it.

I didn't love the croquettes the first night I made them — the taste was good but the texture was weird — almost sandy. I cooked a bunch and served them with the leftover artichoke sauce (not a good idea), a wok-full of a bok choy-related greens with garlic, and steamed rice. I wasn't planning to blog about them because they just weren't up to the standard I adhere to for blog posts. I put the leftover, uncooked mix into the refrigerator.

The next day I took the leftover mix, added frozen corn, and fried the fritters in a small amount of oil in the wok. I don't know if it was the overnight rest in the refrigerator or the addition of the corn, but they were FANTASTIC. Perhaps the steam from the frozen corn changed the texture, or maybe the batter just needed more solids in there with all that garbanzo flour. The corn definitely improved the taste and texture. If you make these, eat them hot off the griddle, when they're at their prime. I ate mine unadorned, and they tasted great, but I can see them topped with a sauce of Veganaise and salsa. I'm posting the recipe with the corn included. I know I'll be making these again.

Bean and corn fritters
  • 1 cup chickpea flour
  • 1 teaspoon chipotle powder
  • 1 tablespoon dehydrated onion
  • 1 teaspoon chili powder
  • 1/4 to 1/2 teaspoon salt (I tend to use less salt)
  • 3/4 cup hot water
  • 1 15-ounce can canellini beans, rinsed, drained and partially mashed
  • 4 to 6 green onions, chopped (about 1 cup)
  • a large carrot, grated (about 1 cup)
  • 1/2 cup chopped cilantro (or parsley)
  • 1 cup frozen corn kernels
  1. Whisk together the chickpea flour, chili powder, salt, chipotle powder and dehydrated onion. Whisk in the hot water.
  2. Stir in the green onions, carrots, cilantro, corn and beans.
  3. Form into fritters and cook in a small amount of cooking oil on a medium-hot, non-stick pan or griddle. You could also use well-seasoned cast iron. You can use a 1/4-cup measuring cup to mold the fritters, if desired. Fill the measuring cup about halfway. (You don't want them to be too thick.)
  4. Cook until the bottom is brown, about 4 to 5 minutes, then flip and cook until the fritters feel firm and done, about 3 to 4 minutes. I like to press them down a bit as they cook.
I ate mine plain for breakfast but I can see them rolled into tortillas with lettuce and salsa, or even stuffed into pita for lunch or dinner.

........................................................................

WIN A COOKBOOK
Head over to One Frugal Foodie to enter a one-day only giveaway for "1000 Vegan Recipes" by Robin Robertson. This contest ends at midnight, Nov. 20, 2009.

November 15, 2009

Stuffed squash / squash muffins

Those gorgeous winter squashes are just so hard to resist, sitting there all colorful and shapely in bins and boxes at farmers markets and coops. There's a growing collection of squash at our house that we know we should use, but no one wants to cut up. Cursing to myself is not uncommon whenever I try to open a winter squash, and knives have been known to break in the process. I think the cook's friendliest squash is delicata - it's not only sweet and delicious, it opens without a fight. Delicata doesn't store well, though, and the time had come to use ours. The squashes were all split, cleaned and baked until tender, and several were stuffed with the filling for Harvest-Stuffed Acorn Squash from "The Vegan Table" by Colleen Patrick-Goudreau. (I got the cookbook for my birthday.) This dish was just as tasty as the other recipes we've tried from "Vegan Table," but really, this post isn't about stuffed squash. It's about finding a delicious use for leftover squash ...

It's about MUFFINS — soft, spicy, sweet, yummy, warm, fragrant muffins. I hate to brag about my own muffin recipe — it's so unattractive — but these were really irresistible. I've had three, so I should know.

I wanted to base the muffins on a gingerbread recipe I used to make, but when I realized my favorite gingerbread recipe hadn't made it to Seattle and was back in the Midwest, and I wouldn't be able to use it as a guide, I started looking for a replacement. But I couldn't find just what I was looking for. I wanted to make muffins with leftover squash, and spice them with fresh ginger. I also wanted to try the coconut oil I just bought (to make tuilles), but wanted to keep the fat to 1/4 cup. I also wanted to keep the amount of sugar fairly low. I worked out the proportion of liquid to dry and here's the result:

Gingery spice muffins
  • 2 tablespoons ground flax seeds
  • 6 tablespoons water
  • 3 tablespoons frozen orange juice concentrate
  • 1/4 cup water
  • 1-1/2 cups white whole wheat flour (stir well before measuring, spoon into measuring cup and level with knife)
  • 1/4 teaspoon salt
  • 1/2 teaspoon cinnamon
  • 1/2 teaspoon allspice
  • 1/4 teaspoon nutmeg
  • 1 teaspoon baking soda
  • 1 teaspoon baking powder (non-aluminum)
  • 1/4 cup organic virgin coconut oil
  • 1/4 cup evaporated cane juice
  • 1/4 cup agave nectar
  • 1 tablespoon fresh, finely grated ginger (I used a microplane), don't skimp
  • 1/2 cup mashed leftover squash or canned pumpkin
Preheat oven to 350˚F • lightly oil 12-cup muffin pan
  1. In a small bowl, mix together the flaxseed and 6 tablespoons water. Set aside for 10 minutes. After 10 minutes, whisk in (or use a wooden spoon) the orange juice concentrate and additional 1/4 cup water.
  2. In a medium bowl, mix together flour, salt, cinnamon, allspice, nutmeg, baking soda and baking powder.
  3. In a large bowl, with a wooden spoon, beat together the coconut oil, sugar and agave until combined and kind of fluffy. (takes about a minute) Mix in the grated ginger. Add the flax mixture and thoroughly combine.
  4. Add the dry ingredients to the wet. Gently stir and fold until well-combined. Do not over-mix.
  5. Divide the batter among 12 muffin cups and bake for 20 minutes or until done. Turn out onto a rack to cool. Enjoy warm or cool.

November 11, 2009

Holiday foods cooking class / herb-infused spiced cranberry-orange relish

Almond tuiles with pumpkin mousse
When I was very young, my family had a habit of going out to dinner on Sunday night — and I don't use the word 'habit' lightly. We went to a Chinese restaurant in Philadelphia's Chinatown, and then to my cousin's house in West Philly. When I say we went to a Chinese restaurant every Sunday, I mean we went to the SAME restaurant every single week - the exact same one in a neighborhood of hundreds of choices. Not only did we go to the same restaurant each week, we ordered the same food. We didn't need to see a menu because my father ordered won-ton soup, egg rolls, chicken chow mein, pork fried rice, spare ribs, and either egg fu yung or lo mein. When I started going to Chinese restaurants as an adult, before I became a vegetarian, I was overwhelmed to see page after page of food choices. There were an overwhelming number of dishes that had no resemblance to chow mein. Where had I been? I started trying different things. (Now that I'm a vegan, one of the things that bugs me about going out to dinner is the limited choice vegans have at so many restaurants! At normal (as opposed to vegan) Chinese restaurants there are usually about five things.)

Holidays can be kind of like my family's Chinese restaurant habit, when we get locked into a pattern of serving the same favorite foods over and over. This isn't necessarily a bad thing, as the holiday menu becomes a family tradition that we look forward to. But sometimes it's nice to shake things up a little and try something different — maybe add one new dish to the menu.

This was what my husband and I had in mind when we recently attended another cooking class at PCC Natural Markets. The class was called Vegetarian Holiday Feast and was taught by Birgitte Atonsen N.T.P., nutritional therapy practitioner, professional whole foods chef and culinary instructor. Birgitte, owner of Nature's Way Food, has been developing and refining her recipes since she became a vegetarian at the age of 12.

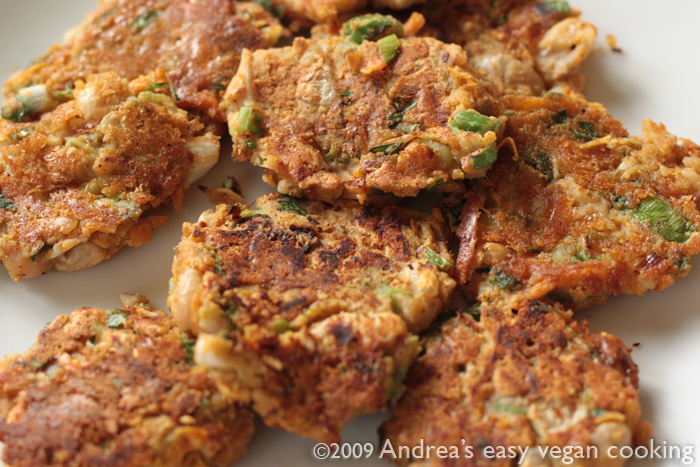
This was the menu: roasted vegetable nut loaf with mushroom béchamel sauce, mashed yams with rosemary, herb-infused spiced cranberry-orange relish, and the spectacular dessert combo of almond tuilles with pumpkin mousse. This was seriously delicious food, and I wish I could give you all the recipes, but Birgitte is working on a cookbook at the moment. The cookbook is not vegetarian, but rather it will be a cookbook filled with recipes that can be altered to accommodate any dietary need. Birgitte wants to provide people with a way to cook for friends with special diets without having to go out and buy different sets of cookbooks. Need those cookies to be GF? She will tell you how. Are you an omni with veggie friends coming to dinner? Brigitte will offer alternatives in the recipes to make them vegetarian or vegan.

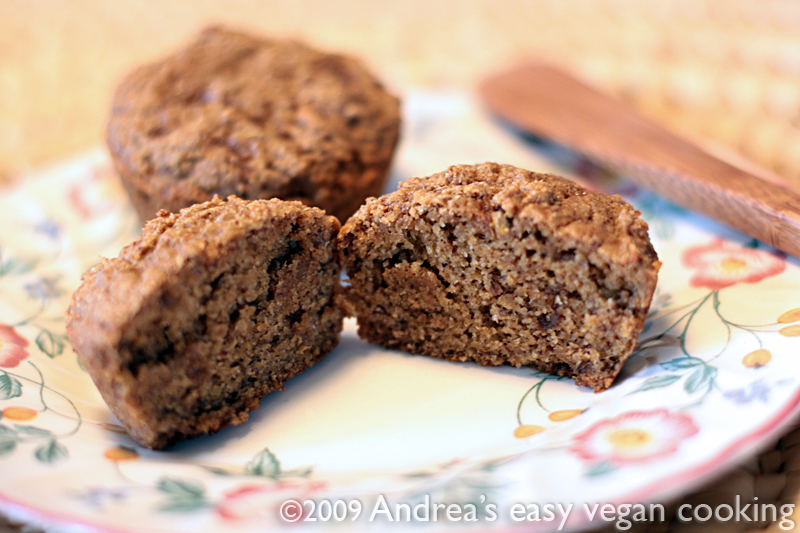
This Thanksgiving I plan to incorporate two of the dishes from the class into my menu. I'm going to serve the cranberry-orange relish instead of my traditional cranberry-apple sauce, and the almond tuiles with pumpkin mousse instead of pumpkin pie. I admit I just can't break my 'holiday habits' enough to change my favorite dishes, and I'm looking forward to seitan stuffed with wild rice, and potato kugel. This will be the first Thanksgiving in a very long time that our entire immediate family will be together, and the first Thanksgiving my husband and I will spend with our little granddaughter, so it should be exciting, fun and delicious.

Herb-infused, spiced cranberry-orange relish
Makes about three cups.
Preparation time: 10 minutes
Cooking time: 30 minutes
  • 1/2 organic orange with skin on, cut up for ease of blending
  • 1/2 cup orange juice concentrate
  • 1 cinnamon stick (2-1/2 inches)
  • 3 whole cloves
  • 1 sprig fresh rosemary or 3 sprigs fresh thyme
  • 1 cup Rapidura sugar (or other evaporated cane juice-type sugar)
  • 1/2 cup filtered water
  • 1/3 cup port (optional but recommended)
  • 2 (approx. 10-ounce) bags fresh cranberries - mine had 12 ounces each
  1. In a food processor or blender blend orange and orange juice concentrate until smooth.
  2. Pour the mixture into a medium pot and add cinnamon, cloves, rosemary or thyme, sugar, water and port (if using).
  3. Bring mixture to a boil, then turn down the heat and simmer for five minutes.
  4. Add the cranberries and simmer until the cranberries burst and mixture starts to thicken, about 20 to 30 minutes. Stir often to keep from burning.
  5. Place relish into a container and refrigerate.
  6. When chilled, remove the cinnamon stick and rosemary or thyme.
I also added 1/2 teaspoon of pure vanilla extract after the sauce was removed from the heat, although it wasn't in the recipe. When I make the cranberries for Thanksgiving, I'm going to slice the leftover half orange, cut the slices into half-moons and make a pinwheel garnish in the center of the dish. Sorry to say I ate the orange before thinking of the garnish when I made the dish for this post.
(recipe © Birgitte Antonsen. Please do not reproduce.)

................................................................

Try something new
If you'd like to add something new to your holiday celebrations this year, you might consider purchasing the e-cookbook, In a Vegetarian Kitchen: A Bountiful Vegan Thanksgiving by cookbook author and artist, Nava Atlas. It's filled with recipes, cooking information and tips for holiday meals by the author, and also includes recipes from other well-known cookbook authors and bloggers. It's only $8.95, and profits from this project will be donated to humanitarian charities concerned with hunger, micro-financing for women in developing countries and the alleviation of human trafficking.

...............................................................

Vegetarian alert - What's in that jar of Planter's Dry Roasted Peanuts?
Peanuts, Salt, Sugar, Cornstarch, Monosodium Glutamate (Flavor Enhancer) Gelatin, Corn Syrup Solids, Dried Yeast, Paprika, Onion and Garlic Powders, Spices, Natural Flavor.

Gelatin is an animal-derived product so look elsewhere for your peanuts if you're a vegetarian or inviting vegetarians to your home. You can find other varieties of Planter's peanuts and mixed nuts that are gelatin-free, so READ THE LABEL to know what you're getting!

November 07, 2009

Uwajimaya / tamarind-tofu-cabbage-bowl

My cousin is an only child, and I am one of three siblings - not that any of us are children anymore — but we were. He had a LOT of toys, and he didn't like to share. My cousin lived in a large four bedroom row-house with his parents and our grandparents. That house was a source of seemingly endless entertainment for my brothers and me. For one thing, it had one of those magical double staircases — you could go to the second floor from the living room, travel through the upstairs hallway to the rear of the house, and descend a second staircase into the back pantry. The second-floor area with the second staircase was dark, cluttered and spooky, making it very alluring for games of hide-and-seek or "disappearing cousin." Technically, we weren't allowed to use the rear staircase because it was "too dark," "too dangerous," "too cluttered." All the more reason why we were unstoppable in its use. But, as enticing as this physical aspect of the house was, nothing was as alluring as the toy room.

There was one bedroom in the house dedicated solely to toy storage. The room was stacked, floor to ceiling along all four walls, with every game, puzzle, science kit and general toy that could be imagined. My memory has the stuff stacked three-deep so that there wasn't a lot of walking space left, but that could be time embellishing memory. Or not. My cousin was the ruler of this cache, and it was up to him to decide which toys we could play with. Now, I'm not saying he was selfish, or a tyrant, but he was a little arbitrary about which things we could use. I knew he'd never let us use the chemistry set, but there were certain other things I gravitated towards, and was often frustrated by his iron grip. His parents encouraged him (sort of) to share, but didn't make him.

He'd usually let us play Clue, but not always. Sometimes he'd allow the Lincoln Logs, which was good since I was the only one who liked them. The boys would tire of them quickly and go off to run up and down the staircases while I built farms and housing developments. But the real object of my desire, the Legos, were usually off limits. I'd plead and beg for those Legos, and only rarely would he concede. The cuz had a most remarkable collection of tiny little Legos, including little white window frames and shutters. He had zillions of intricate pieces, and playing with them was heaven. My brothers would soon get bored, and I'd have them all to myself until my cousin required them back in their storage location.

I'd love to go back in time and have a glimpse at that room again to see if it really contained every toy made, or just seemed like it. It was a little daunting to be in the presence of so much stuff I wanted. Kind of like last weekend, actually, when I found myself in the grown-up food equivalent of the toy room.

Part of our stash from Umajiwaya
When we walked into Uwajimaya Inc in Seattle's International District, I literally burst out laughing. Uwajimaya is an Asian supermarket that has everything you could possibly want, from fresh vegetables to the most obscure seasoning AND an entire gift and kitchen tool department. I didn't know which way to turn. You can get one hour of free parking if you spend six dollars, and the minute we walked into the store, it was pretty clear that wouldn't be a problem. We didn't buy any veggies, though they were sorely tempting, having just been to the farmers market the day before, but headed toward the aisles of Asian foods. I had a shopping list that magically expanded as I spied more and more ingredients I suddenly remembered "I just had to have." We found all the expected things like dried mushrooms, brown rice vinegar, rice noodles and yuba, but also unexpected things like an organic mix of brown jasmine-red-black rice from Thailand. We were able to find locally made tofu and tempeh, as well as Shark brand sriracha (without preservatives) in a giant bottle for just $2.99, less than we'd previously paid for a small bottle.

The first things we used from our shopping expedition were the tofu and rice in a recipe from our "Vegan Yum Yum" cookbook. Though not an Asian dish per se, the tamarind tofu cabbage bowl was satisfyingly delicious. It was a simple and tasty last minute dinner solution.

Everything we've made from the cookbook so far has been easy and delectable, and this was no exception.

The rice reminded me of a delicious Thai rice we'd been given as a gift some time ago. When this rice is gone, I think I might make my own three-rice blend from the rice available at the coop. I'll use a jasmine brown rice for the bulk of the mix, a red rice and a black rice.

November 03, 2009

Bread, pizza - fast and delicious / kale salad

Last night I attended a book talk by Zoë François who is on tour promoting her book, "Healthy Artisan Bread in Five Minutes a Day, which she co-wrote with Jeff Hertzberg. I'm not such a big bread eater but I do love to bake bread. I like to experiment with different flours and methods to create beautiful breads with great texture and flavor. I've made naturally fermented breads (no yeast or starter) as well as made my own sourdough starter to create deli-style rye breads. I've made bagels, pita, tortillas, soft pretzels and naan. I usually make my own pizza dough, and sometimes I make crackers. I've made bread that took days to make from start to finish, and I once even hand-built a large ceramic bowl to mix large batches of dough in because I couldn't find one I liked.

Now I'm having fun making bread that takes almost no effort or time, á la Zoë and Jeff's technique. As I 've mentioned in a previous post, a fairly wet dough is mixed up right in a storage container, and left two hours to rest. A hunk of it is quickly shaped, rested and baked on a stone, and the remaining dough is stored in the refrigerator for up to two weeks so it's ready to use anytime. As the dough ages, it develops more character and sourdough flavor. When the dough is used up, a new batch can be made in the container without washing it first, to jump start the sourdough qualities that give the bread its character.

I've got a bread (pictured above) on the counter, and dough for one remaining loaf stored in the refrigerator. A few days before the loaf above was baked, dough from the same batch was used for pizza. I made these things using the master recipe from the book mentioned above. I've been making whole grain breads using this method for quite a while but I had been treating dough meant for pizza a little differently - using more flour in the mix for a firmer dough. It's a lot easier to get the pizza from the peel to the stone when it's got some body. I used the wetter dough for the pizza (shown below), and had some difficulties which I meant to ask Zoë about last night but completely forgot. I sprinkled extra flour when I formed the crust, and lots of cornmeal on the peel so the pizza would slide onto the stone, but when I tried to transfer the pizza to the hot stone in my oven, it wouldn't go without leaving the toppings behind! I finally gave up and cajoled it into a pan.

It seemed to me the extra moisture in the dough steamed the crust in the pan, making the texture a bit more spongy than the crispy, chewy effect I look for in my crust. It was still good, but not perfect. I thought about next time putting the sauce and cheese on the crust, sliding it onto the stone, then quickly adding the bulkier toppings while the pizza is in the oven. I don't like this idea because for one thing, it sounds dangerous, and for another, the oven heat will escape, and the oven should be hot when the pizza first goes in. I've got some more experimenting to do or questions to ask. Or maybe I should just wait for Zoë and Jeff's next book to come out. They're working on one about pizza and flatbread!

The pizza, by the way, had a very thin layer of Follow Your Heart mozzarella topped by a sprinkle of Daiya mozzarella. This combination produced the best tasting pizza I've had in quite a while. The real stars of the topping, though, were broccoli slices and mushrooms. To go with the pizza we had a salad of massaged lacinato kale, shredded carrot, baby salad greens and edamame. The kale was very thinly sliced (roll into a thick wad and slice crosswise) and rubbed with olive oil and a little salt. The edamame was sprinkled with umeboshi vinegar and left at room temperature for a half hour to marinate. The salad was dressed with olive oil and lemon.

You can visit artisanbreadinfive.com to get more information about making artisan no-knead breads. It really does take about five minutes to mix it up — but there's still the resting and rising that any bread must go through. The big difference is the dough waiting in the refrigerator to be baked into the next great loaf.

note: The seeds on this loaf are black mustard, caraway, dill, and crushed red pepper. The mustard seed was surprisingly delicious in this combination!

November 01, 2009

It's November / veganmofo wrap

I meant to do my Vegan Mofo wrap-up before October ended but here it is only one day late. This was my first mofo, and the most I've ever blogged in one month. The part that was most exciting for me was finding and reading so many blogs I'd never seen before. It was thrilling to discover so many vegan blogs with wonderful recipes and gorgeous photos. I had no idea there were so many. My reading list is now stuffed with even more great blogs than before. As others have mentioned, it was hard keeping up with reading and commenting on so many posts; sometimes the comment would be in my head but I was just too tired to type it. I want to thank those responsible for organizing the event and posting the recaps. I followed many of those recap links to find new blogs. I especially want to thank all the vegan bloggers for sharing so much creative energy. Now all those intriguing recipes await!