Showing posts with label cranberry smoothie. Show all posts

November 26, 2011

Pre-Thanksgiving: tofu turkey or TG part 1


I altered our family tradition this year and made a tofu turkey instead of a stuffed seitan, and I thought I'd do a little step-by-step photo story as I made the dish. I really love when bloggers show the progress of a complex creation. Unfortunately, I'm not one of those people, though I seriously tried. The camera was in the kitchen, but my mind was preoccupied, and I only got so far. The recipe on which I based my tofu turkey is here. (I made my own version of stuffing.)


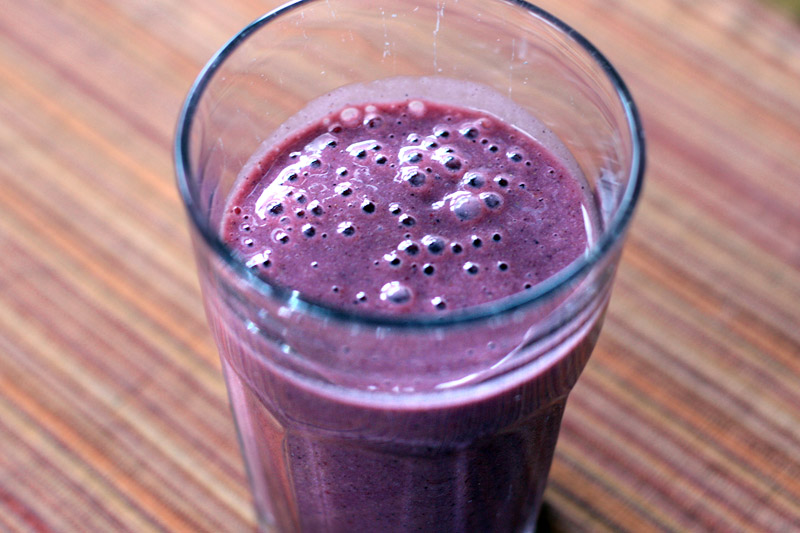
Before getting to the tofu, I started the day with a nod to the season and made a cranberry smoothie. It also had banana, frozen blueberries, frozen mango, a tablespoon of frozen OJ concentrate, lucuma powder (thanks, Ricki!) and almond milk. It was so pretty and delicious that I think frozen cranberries may become a regular smoothie ingredient. Suitably fortified, I moved on to the tofu business.

The following takes place the day before Thanksgiving.
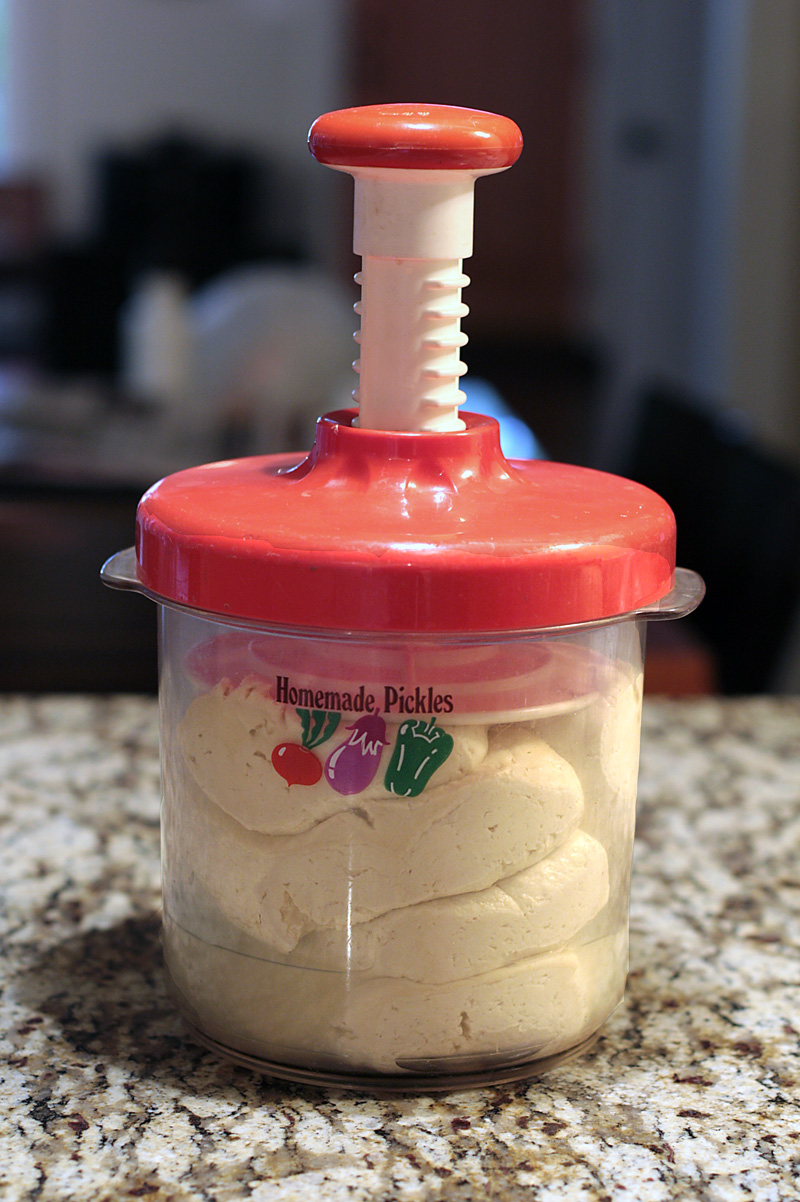


Since pressing the tofu seemed key to getting the texture right, I first pressed my tofu for a few hours in my Japanese pickle press. The tofu was the fresh stuff from a Vietnamese tofu shop, and seemed quite firm, but I was amazed to see how much water came out of it, so I'm glad I took this extra step. Fresh tofu is much more flavorful than the supermarket variety, and I wanted my concoction to taste really good, but any extra-firm water-pack tofu would be fine.


After pressing, the tofu got puréed in a food processor. (I tried the VitaMix first, but that was too gross, and removing the tofu from the blender jar was horrible.) Next the seasonings were added. I used hickory smoked salt in the seasoning mix, not broth powder. In addition to the herbs in the recipe, I added some light yeast flavoring that I'd previously made from this recipe from Miyoko Nishimoto Schinner.* (She used to make and sell the Now and Zen Unturkey, which I've never actually tried, but the light yeast seasoning is very handy, and you might want to make some!)


The next step was to line a colander with cheesecloth, and pack the tofu into the colander, covering the top with the overhanging cheesecloth. A plate got placed on top of the cheesecloth and a weight was placed on the plate; in this case two boxes of veggie stock were placed on their sides atop the plate. This is where the communications between my brain and the camera broke down, and no further illustrative photos were taken. The tofu-packed colander was placed on a plate and went into the fridge overnight.

The following takes place on Thanksgiving day.
I made a stuffing with wild rice, brown basmati rice, toasted walnuts, onions, garlic, ginger, fresh sage and lots of baby bella mushrooms, all cooked to perfection in my trusty wok. Once the stuffing was made and cooled, the cheesecloth over the top of the tofu was pulled aside, and tofu was scooped out, leaving a rim of 1 to 2 inches. The resulting hole was filled with stuffing, and the tofu I had removed was smoothed over the top, forming a solid covering. (Still in the colander.) The next part was a little scary, but it worked perfectly.

To cook, the stuffed tofu was inverted onto a baking pan, and the cheesecloth-covered blob miraculously fell out without breaking. I carefully removed the cheesecloth and basted the mound, placed it into the oven, and removed and basted many times until it was done. In the end, I had to turn the oven up to 450˚F for about 20 minutes to crisp it up.


Voila! It emerged looking quite nice. I had planned to surround it with roasted veggies but miscalculated the amount of space it would take up on the serving platter, so settled for some parsley and a few tomatoes.


Here's a view of the inside. The recipe said it served six, but I knew that couldn't be right since five pieces of tofu were involved. In fact, we had lots of leftovers to send home with guests, and even though we ate it again last night, we STILL have leftovers. Next year: smaller tofu turkey or more guests!

In my next post, I'll show you what we actually had for our meal. Hope everyone who celebrated Thanksgiving, had a lovely time.

*Miyoko Nishimoto Schinner is the author of Japanese Cooking: Contemporary and Traditional, which I reviewed here. She is also the author of The New Now and Zen Epicure: Gourmet Vegan Recipes for the Enlightened Palate, and she writes a cooking blog called, The Vegan Manifesto.

November 30, 2010

Curried Chickpea Cakes and Coconut Panna Cotta from Skinny Bitch: Ultimate Everyday Cookbook

MOFO
Running Press recently published bestselling author Kim Barnouin’s new vegan cookbook, Skinny Bitch: Ultimate Everyday Cookbook, and the publicist for the book offered to send me a couple of the recipes to test and post. You can read more about Kim on her blog, www.skinnybitchdaily.com, but I'm sure you're probably already familiar with her book, Skinny Bitch in the Kitch.


Photo courtesy of Running Press

I'm always interested in trying new recipes, so I agreed to sample and post them for you. We tried the curried chickpea cakes, and they were easy to make and delicious. I liked them so much I plan to bring them to a party this weekend. But, to be honest, I thought they tasted even better the next day, so I'm going to make them on Friday and reheat them on Saturday. We served them with broccoli, rice and veggies, and leftover cranberry sauce, but when I bring them to the party I'll probably make some sort of topping for them — maybe something with avocado as shown in the photo. (Although the recipe considers one cake a serving, I think an adult will eat at least two of these for dinner.)


Curried Chickpea Cakes

Makes 10 Servings
  • 1 (15-ounce/430 g) can chickpeas, drained and rinsed
  • 1/3 cup (20 g) sliced green onions, both white and light green parts
  • 1/3 cup (75 ml) light coconut milk
  • 2 teaspoons evaporated cane sugar
  • 2/3 cup (75 g) breadcrumbs, plus 1/4 cup (30 g) for coating
  • 1 teaspoon curry powder
  • 1/2 teaspoon nutmeg
  • 1/2 teaspoon cumin
  • 2/3 cup (130 g) brown rice, cooked
  • 1/2 teaspoon salt
  • 1/4 cup (60 ml) grapeseed oil or toasted sesame oil, for pan searing
  1. In a large food processor, combine the chickpeas and green onions. Pulse until combined. Transfer to a large mixing bowl. Add the coconut milk, sugar, 2/3 cup (75 g) of the breadcrumbs, curry powder, nutmeg, and cumin. Stir together with a wooden spoon until well combined.
  2. Stir in the brown rice and the salt.
  3. Mold into 10 mini patties.
  4. In a large sauté pan, heat the oil over medium heat. Add the chickpea cakes to the pan and sauté until there’s a nice golden sear on the bottom. Flip and sear the other side as well. Continue with the remaining cakes.
  5. Transfer to a paper-towel-lined plate to drain.
Serving Size: 123 g; Calories 170; Fat 7 g; Saturated Fat 1 g; Cholesterol 0 mg; Carbohydrates 23 g; Fiber 3 g; Protein 4 g

I didn't try the second recipe, though it sounds very luscious and exotic. I'm not a big dessert person, and I think I'm still overwhelmed by all the dessert I ate for Thanksgiving — and after. I'd love for you to try it and let me know what you think.


Photo courtesy of Running Press

Coconut Panna Cotta
Kim says, "I never thought it would be possible to have such a creamy and rich vegan dessert, but here it is. A brilliant and determined chef friend of mine gave me some of her trade secrets to pull this one off. You have to refrigerate for a couple hours so it can set, it’s a good one to make on the weekend." Makes 6 Servings
  • 3/4 cup (180 ml) cream of coconut (like Coco Lopez)
  • 3/4 cup (180 ml) light coconut milk
  • 1/4 teaspoon coconut extract
  • 1/2 packet of vegan gelatin mix, unsweetened and unflavored
  • 2 tablespoons cold water
  • 1/3 cup (50 g) frozen mixed berries
  • 1/2 cup (120 ml) hot water (or more)
  • 1/2 cup (100 g) evaporated cane sugar
  • 1 teaspoon almond extract
  • 5 fresh strawberries, minced, for garnish
  • 1/4 cup (25 g) toasted coconut, for garnish
  1. In a medium saucepan, heat the cream of coconut, coconut milk, and coconut extract to a simmer over medium-high heat.
  2. In a medium bowl, mix the gelatin and cold water together until the gelatin dissolves completely.
  3. Add the gelatin mixture to the coconut mixture and whisk, until well dissolved. Continue to simmer 3 more minutes.
  4. Pour the coconut mixture into six small ramekins and cover with plastic wrap.
  5. Refrigerate for 2 to 3 hours to set.
  6. In a separate medium saucepan, heat the berries with the hot water over medium heat. When they are defrosted and starting to break down, add the sugar and stir until it forms a sauce. Add more hot water if necessary, one tablespoon at a time. The sauce should be slightly thick.
  7. Remove from the heat and stir in the almond extract. Strain the berry sauce to extract the seeds. Drizzle a little of the berry sauce on each serving plate.
  8. Remove the panna cotta custards from the refrigerator and run a knife or toothpick along the sides of the ramekins to loosen.
  9. Carefully turn each ramekin upside down onto a plate. Remove the ramekin and garnish with strawberries and coconut.
Serving Size: 1 Ramekin 155 g; Calories 250; Fat 14 g; Saturated Fat 13 g; Cholesterol 0 mg; Carbohydrates 33 g; Fiber 2 g; Protein 2g

The above two recipes were reprinted with permission.

...............................................................................

No more leftover cranberry sauce


Did you know that cranberry sauce tastes great in a smoothie? Here's one made with banana, mango, mixed berries, cranberry sauce, almond butter and almond milk. So, so good. I'm sorry to see what appeared to be an endless supply of cranberry sauce finally come to an end. But it was a good end.

...............................................................................

Here's a yarn you might find interesting
Bethany and I were out shopping again — this time for yarn, so her husband can make his mom a scarf for Christmas. (Yes, her husband knows how to crochet.) We went to three yarn shops before we finally found nice yarn without wool or silk, or believe it or not, fiber from pearls. We were getting kind of testy at the lack of selection, but finally found yarn made from banana peels or bamboo or something — can't remember which, as I'm a little dizzy from the strain of reading all those yarn labels.

...............................................................................

Farewell mofo 2010
So this is my last mofo 2010 post, and though it was fun, I don't think I'm a post-a-day sort of blogger. I'll be taking a little rest, but will be back soon with weird noodles and other stuff. Thanks for reading!