
I suppose if you're not into making ice cream as much as I've been this summer, you might not care that I've been fine-tuning and perfecting my strawberry ice cream recipe, and I don't blame you. However, I write the recipes for myself as well as you, and I want an easy place to find it should the need arrive—even if it's fall or winter when the urge to make ice cream strikes again. I want to be prepared. Besides myself and my husband, I've tested the ice cream on my sugar-obsessed grandchildren, and they gave it the thumbs up. We did a larger than usual bit of childcare this summer, and it was always fun to have a stash of delicious (relatively healthy) ice cream in the freezer. Not sure if I should admit this or not, since it might not qualify as 'good' grandparenting, but I held an 'unlimited ice cream and cake day' event at our house, and it elicited much delight and appreciation from the participants, who were all under the age of eight.
The ice cream recipe is much like the last strawberry recipe I posted, with a couple of tweeks. It may have a couple of extra ingredients, but it's still easy to make. I made it with my Vitamix so I can't really say how a regular blender or a food processor would handle the task of blending the ingredients, but with a little extra care and attention, it should work. And I used my old Donvier non-electric ice cream maker. I'll post the recipe at the end of the page.
Escape to Orcas Island
 |
| The view on the road to our cottage. |
We weren't able to travel this summer as we didn't feel comfortable leaving our dog, Callie, because of her health issues. Feeling the need to get away for a few days, we decided to take Callie, who was doing well, on a little trip to Orcas Island, one of the San Juan Islands, north of Seattle. The trip there, including the one-hour ferry ride, took about five-and one-half hours. (It should have taken about four except for my husband's abnormal need to get everywhere early. Traffic, you know.)
 |
| The view from our cottage deck |
We stayed in a lovely VRBO cottage located down a private, steep, narrow, gravelly road with a hairpin turn, so as you can imagine, it was pleasantly quiet and peaceful. Although isolated, the cottage was near everything we wanted to do.
 |
| Moran State Park. |
We like to hike, so the first place we headed was Moran State Park, where we picked an 'easy' trail around the lake. You know, for Callie.
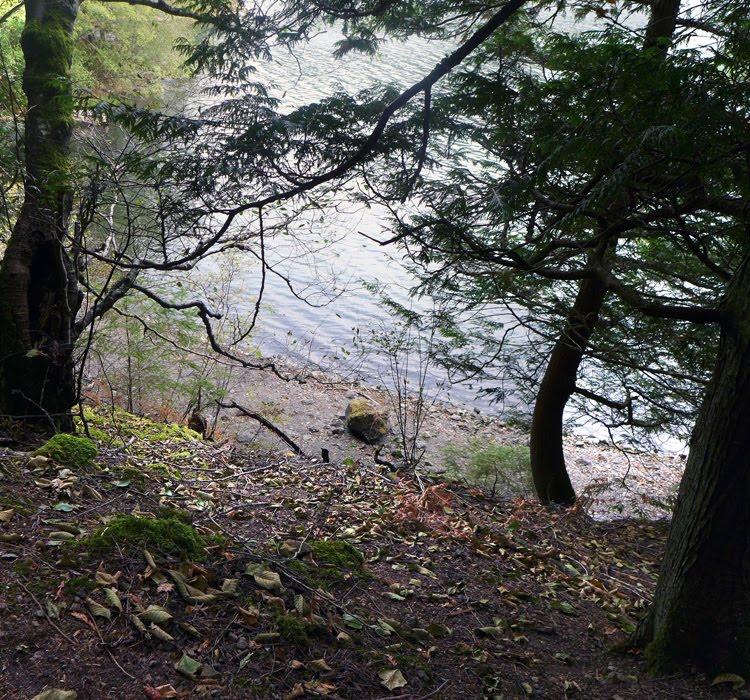 |
| Moran State Park. |
While hiking, we made a wrong turn somewhere and added an extra mile to the trek, but Callie managed well. We only hiked about 4-1/2 miles, but my step app said I had climbed 18 flights of stairs. Yikes. Although steep and uneven, the trail was beautiful, and we were pleasantly tired out from our hike.
The second day we took it easy and explored the town of Eastsound.
 |
| Gluten-free sourdough bread from the Barn Owl Bakery. |
While we were there we stopped into the food co-op, and purchased a sourdough, gluten-free bread (baked by the Barn Owl Bakery), which was a revelation. (More about the bread another day.) We also took to the road in search of the home and studio of Anthony Howe, an artist who creates large metal kinetic sculptures that are fantastic and unique. I knew he had closed his property to tourists (and stalkers), but I was hoping for at least a roadside view of some of his work. We did glimpse a few pieces, but it was frustrating not to be able to enter the property to see the incredible creations up close. It was the possibility of seeing Howe's work that drew me to Orcas Island.
 |
| Crescent Beach. |
Our last activity of the day was an exploration of Crescent Beach, which is, of course, shaped like a crescent. I have what I'll call a strong predilection for collecting rocks, and the beach was covered in possibilities, but I controlled myself and only took three small samples — and no driftwood since that was forbidden by the signs.

Here's our tired pup resting after two days on the go.
 |
| A view from the trail at Turtleback Mountain, south access. |
On our last day we had a ferry to catch, but we didn't want to waste the morning so we headed to Turtleback Mountain for a last hike. After the first interesting part of the climb, the trail became wider and easier to manage, except it was soooo steep. We did have spectacular views, though. I kept thinking that it would sure be a lot easier to go back down, but I was wrong. I have a modest fear of heights, and once we turned around for the descent, and I was confronted by the steepness of the trail, going down was a challenge! We only had time for 2-1/2 miles, but my step app said I had climbed 27 flights. No wonder it felt so steep.
As lovely as it was to be away for a few days, it was good to be back home — and find a stash of strawberry ice cream in the freezer.
Strawberry ice cream update

- 1 cup cashews, soaked 4 hours and drained
- 1-1/2 cold rice milk
- 2 teaspoons pure vanilla extract
- 1/2 cup, rounded, packed, soft, pitted mejhool dates
- 3 very ripe, very cold bananas (Refrigerated ahead of time.)
- 2-1/2 cups frozen strawberries, divided
- 1/2 cup frozen mango chunks
- juice from 1/2 lemon
- Set out 1/2 cup of berries to slightly defrost while you follow the rest of the steps.
- Place the cashews and rice milk in the blender and blend until creamy.
- Add the vanilla, dates, bananas, 2 cups strawberries, 1/2 cup mango and lemon juice to the jar, and blend until the mix is creamy and smooth. If the mixture is too thick to blend, you may have to add up to an extra 1/4 cup of rice milk, but only add if absolutely necessary.
- Thinly slice the slightly defrosted strawberries and stir into the blended mix. Work quickly to keep everything as cold as possible. (If your mix has warmed from the blending, refrigerate for an hour or so until cold.)
- Freeze in an ice cream machine according to the manufacturer's directions. I use a low-tech Donvier.
- When finished, the ice cream will be the consistency of soft-serve. Pack into a container and store in the freezer to harden. It can take several hours for the ice cream to reach a firm consistency. After longer freezer storage, let it sit out for 10 minutes to soften a bit for scooping.


